IN-PERSON ORDERING 101
Welcome to joe Point of Sale - the only system built by former baristas, specifically for the coffee industry. This article is a part of our joe 101 series, where we walk through the basics of using joe Point of Sale in your coffee shop. First up, processing an in-person transaction using the joe Point of Sale.
IN THIS ARTICLE
1 - How to navigate the POS Menu
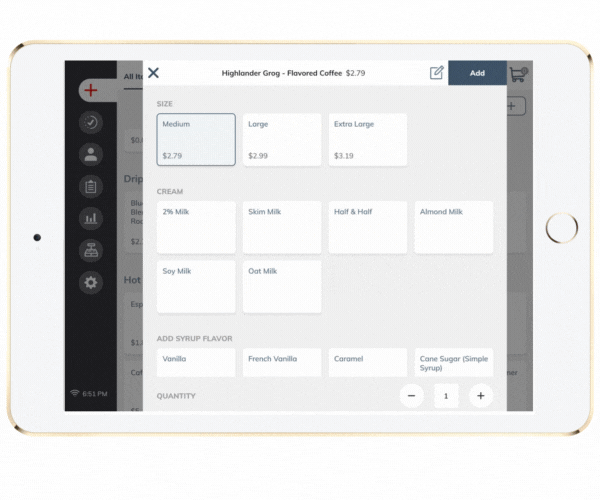
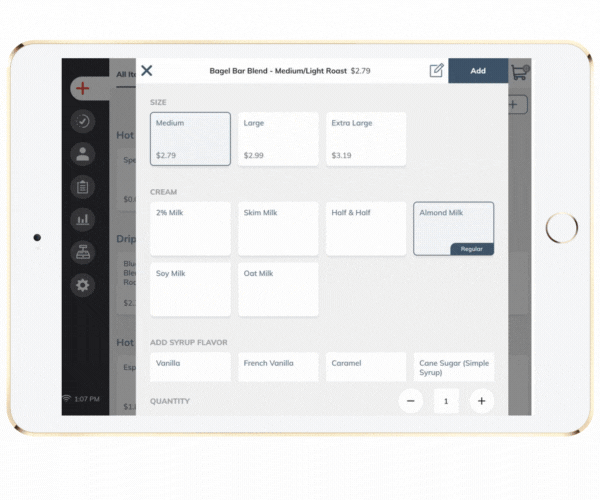
We built the menu to help shops have the ability to duplicate their ONLINE MENU but also to be SUPER Intuitive for the baristas. In the menu item buttons you will notice key modifiers that only apply to COFFEE SHOPS that streamline the barista workflow.
- Categories: Your menu is structured with Categories at the top of the menu layout. You have the option to add CUSTOM category and rearrange it as you'd like but it's up to the owner and baristas.
- Sub Categories: Are also available for your team to help navigate the menu and find items faster during the in person ordering experience.
- Modifiers: The modifiers listed below are the modifiers for drink creation considering milk alternatives, syrups, espresso, etc.
- Custom/Miscellaneous Item: Simply tap the + sign on the right side of the menu to input price of the item and description
- Simply Tab the + symbol will be available on your order creation journey
- Input the price and note of the "Misc Item" you are placing in the system. Very Important for reporting purposes.
- Edit the Misc Item at checkout screen by tapping the item like you would any other order.
- Note: Add a note to the item by tapping the notepad with pencil icon and input desired note

2 - How to navigate the checkout screen
To access the checkout screen please make sure to SELECT the SHOPPING CART on the top right of the menu. This will take you to the checkout screen to add a customer name, apply discounts, duplicate items or edit items swiftly and easily.
- Discounts: Simply tap the discount ICON placed under the Item price
- Duplicate/Remove Items: On the checkout screen you will also notice a Duplicate Button and Trash Can on the left of the item name
- Input Customer Name: This a great tool to input customer name for the receipt and ticket
- For Here/To-Go: You can select the Dine - In and To - Go for the customer tickets for their order to support the drink making process and cup decisions.
- Payment Methods
- Cash
- Credit/Debit Card
- Manually Enter Card Details

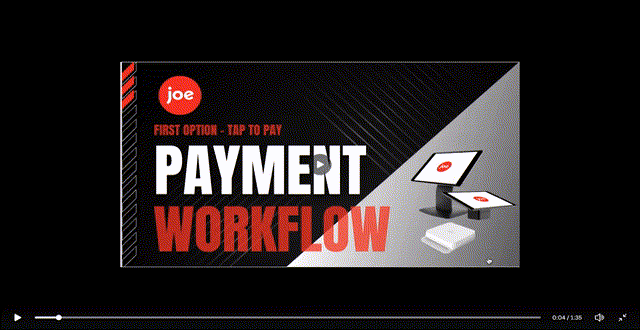
3 - How to process different payment methods and flow
To process payments you have three different payment flows you can follow. The very first step before being able to process payments the CUSTOMER must select if they will like to "Claim Points" or "No Thanks". Once the customer answers the prompt to the question it will move forward to payment method.
Cash Payment:
- Select the payment option
- Enter Cash Amount provided
- Hit Confirm with change amount
- Payment Complete
- Credit Card/Debit Card:
- Select Debit/Credit Card
- Prompt will appear on customer tablet to tip
- Customer will then see a screen to insert, tap or swipe the card.
- Card Reader will make a sound and payment is complete
- Manually Enter Credit Card Details
- Tap enter card details
- Input 16 digit Credit Card Number
- Confirmation Code
- CVV
- Then Tap Pay
- Swipe Credit Card/Debit Card: (Only Available for Non-Chip or Tap Cards)
- Select Debit/Credit Card
- Prompt will appear on customer tablet to tip
- Customer will then see a screen to insert, tap or swipe the card.
- To SWIPE the card YOU MUST TAKE THE READER OFF the docking station
- Then Swipe the card on the back of the reader
- Card Reader will make a sound and payment is complete
4 - Discount Feature
This feature allows baristas to apply discounts to customers with a swift tap of a button at checkout. This introduces the capabilities to implement discounts at an item level but makes it easy to apply it to the entire order if necessary. We understand how important this is for employee discounts, family and friends and local community members you'd like to apply a discount at the swift tap of a button.
Updates will include:
- Discount Button at Checkout
- Dollar Incremental Discounts: $1, $2, $5, $10
- Percentage Incremental Discounts: 10%, 25%, 50% and 100%
- Custom Discount: You can select $$ or %% and enter the desired discount you'd like to apply
5 - How to create a MISC Item
Misc Items Feature
We've added the Misc. Item button or better known as Custom Keypad to the joe Point of Sale. We know how important it is add a quick item that isn't on the menu or certain rotating pastries available for the day!
The latest update includes a more robust feature set for the following:
- Simply Tab the + symbol will be available on your order creation journey
- Input the price and note of the "Misc Item" you are placing in the system. Very Important for reporting purposes.
- Edit the Misc Item at checkout screen by tapping the item like you would any other order.
6 - Manual Card Entry
Manual Card Entry is necessary for Barista's at checkout order creation for shops. You will have the option to enter the card at checkout and provides you with an option to enter the card details if the card inserted or tapped is unable to process with an outdated card or populates an error.
- Tap enter card details
- Input Credit Card Number
- Confirmation Code
- CVV
- Zip Code
Note: This will continue to develop so you can process shipping or additional card transactions,
.gif)